Secunia PSI is a must for any Windows machines

Keeping up with program patches and updates can be extremely difficult, but thanks to your friends over at Secunia, those problems can be all but eliminated! This is a (somewhat) complete guide on getting Secunia PSI (Personal Software Inspector), installing, and running it! This program is a must for anyone who runs any Windows OS. This is partly because it’s only available for Windows. These images were taken from a Windows 7 Home Premium 64-bit OS, but it should be pretty much the same for any other OS.

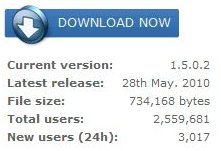
At the time of this writing Secunia PSI was on version 1.5.0.2.

First, lets get Secunia PSI downloaded. Head on over to Secuina.com and look for the download button.

this is an image

After downloading head over to where ever you saved it to, and double-click to run. NOTE: Windows may ask is you want to run the program, click yes!

Now follow the instructions. Images below will help guide you through the process.
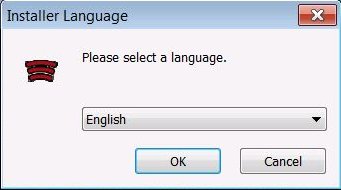
Select a language.
this is an image
Click Next
this is an image
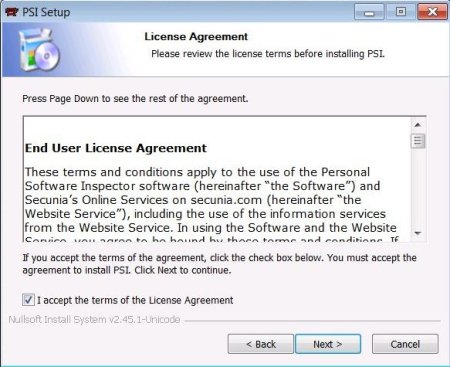
I accept the terms of the License Agreement (Don’t forget to read it!)
this is an image
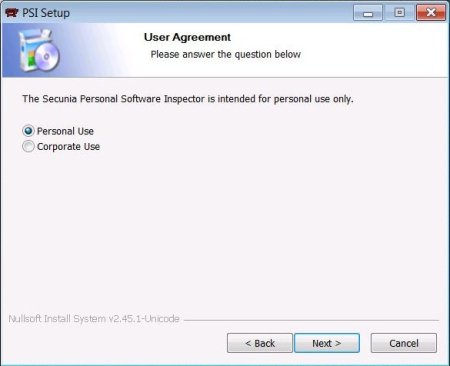
Select Personal Use, unless you are using it for business purposes.
this is an image
More reading
this is an image
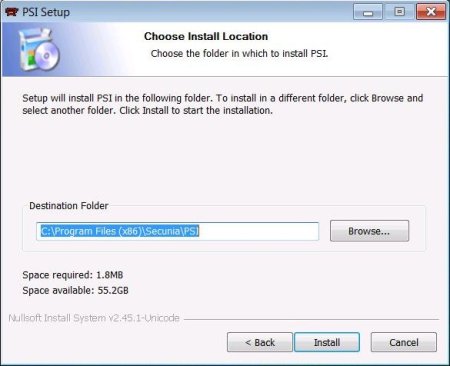
Tell it where to install
this is an image
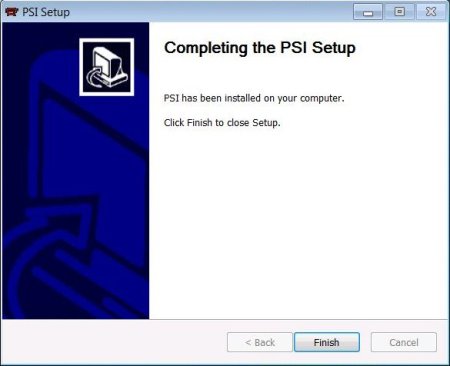
Once done, click finish
this is an image
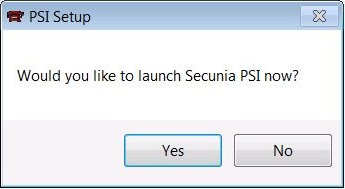
It will ask if you want to run it. Say yes.
this is an image
Once it starts you may see message saying “Please wait while network connectivity is verified.” Have no fear, this is normal. As soon as the program can see the servers it will continue. If you have a software firewall installed you may need to allow Secunia PSI access to the Internet.

Now onto usage!

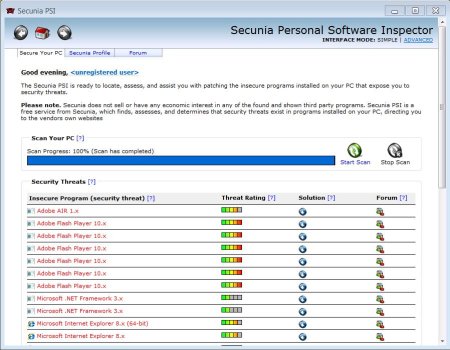
After the program scans it will come up with a list like this. This image is a good scenario (of a bad situation), you may get one just like it or worse. If the insecure program is listed as a Microsoft product it should be dealt with by using Windows Update. I did not include how to do this because it varies from XP, Vista, and 7.
this is an image

Here I’m going to update Adobe Flash Player 10.x. I click on the Blue down arrow, I get a dialog box to download the new software.
this is an image

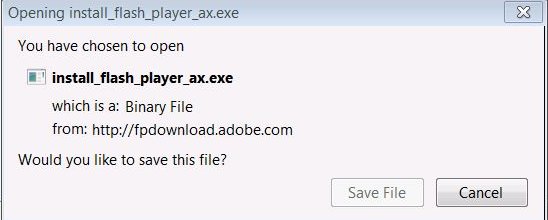
Save the file (remember where you save it to!)
this is an image

Then run it! Just follow the steps for each program. In this case there were many listings for Adobe Flash Player. You only need to download it once and run it once. Once you scan again it will show them all fixed up. (FYI: The reason it lists many copies is because Flash Player is installed in several places due to different web browsers)
this is an image

After you do this a few times and run windows update you can manually start the scan again. Once you are set you will see something like this.
this is an image

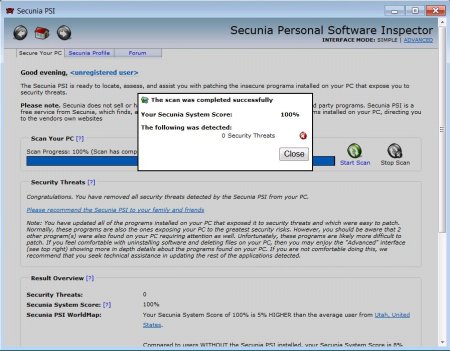
You are set! Look at you! You have already mastered this awesome utility!

By default Secunia PSI is set to run at system startup. This may not be best if you are on a laptop, or have a very slow computer. If Secunia PSI is running you will see a little icon in the bottom left corner of your screen. It looks a little like this.
this is an image

Questions?

Use SSH Keys Instead of Passwords

I have been living and working in SSH environments for quite some time now. I even created a little bash script to help me keep track of all my connections. Today I wanted to talk about a new way (well, it’s not really new, but new to me I guess) of connecting to other Linux systems by using keys instead of passwords.

Normally when you open an SSH connection you are presented with a password request. The down side to using passwords is that if your not paying attention you can be hit with a brute force or dictionary attack. Because you allow passwords to be used there is a chance of someone gaining access. With keys only you have nothing to fear from these types of attacks.

Here is how it works. Normally you enter a password. With keys all you need to do is form the SSH connection and the keys transmit automatically. Once the keys are paired you are connected with a shell. There are two different ways of performing key pairs. The first way is just the key. No need for a passphrase. The other is a passphrased key. I will talk about both.

First is the “no passphrase key.” In this example you will create a key, upload it to the host, then every time you connect you will not be asked for a password or passphrase. Keep in mind that by doing this there are risks involved. More on that later.

To make a “no passphrase key” you need to generate a key pair. The simplest way of doing this is:

ssh-keygen -t rsa

When it asks you for the password just hit enter. You will get an output of something like this.

Generating public/private rsa key pair.
Enter file in which to save the key (/home/user/.ssh/id_rsa):
Enter passphrase (empty for no passphrase):
Enter same passphrase again:
Your identification has been saved in /home/user/.ssh/id_rsa.
Your public key has been saved in /home/user/.ssh/id_rsa.pub.
The key fingerprint is:
52:b8:d4:fd:d3:f6:ef:46:d1:90:42:de:e2:94:f4:09 user@localhost
The key's randomart image is:
+--[ RSA 2048]----+
|           .E  . |
|       o . o.=o. |
|      o o . =.+..|
|     . o   + o ..|
|      o S   + o .|
|       .     o ..|
|               ..|
|                o|
|               oo|
+-----------------+

NOTE: These are test keys I generated, they won’t work after today.
This created two files. “id_rsa” and “id_rsa.pub”

Take the id_rsa.pub file and upload it to the remote system. There are several ways of doing this. You can use scp, or if you are already connected you can copy and paste the contents of the file in pico, nano, vi, vim, what ever your favorite editor it. Be sure if you use the copy and paste method you keep the entire key in one line!

For scp type:

scp id_rsa.pub @:/.ssh/

This will upload the pub file to the remote host. Once uploaded, login then navigate to ~/.ssh (your user’s home directory then to .ssh). Once there look for a file called “authorized_keys” and cat the contents of the pub file to it. If the file already exists type:

cat id_rsa.pub >> authorized_keys

If the file doesn’t exist use only one (1) “>”

For the copy and past method, cat the id_rsa.pub file to display the output. Select it. Login to the remote host. Open authorized_keys in an editor of your choice. Then paste the copied key. Make sure it stays all on one line! If you don’t it will not work. Save the file.

Once one of these two steps for implementing the key file has been completed you are good to go! You can delete the .pub file if you desire.

Now, onto part 2!

Here is where we generate passphrase keys. It’s basically the same task. When you generate a key put in a passphrase! Remember the passphrase. It is very important. Now when you login you will be prompted to enter you passphrase. This will unlock the key to be used for the connection. It should be different from your normal password.

Now, a few more little notes I want to talk about.

The problem with no passphrase keys: Without the need for a key is someone gains access to your system (like a laptop) they can gain access to any system you authorized that laptop to connect to. With passphrased keys you must type in a passphrase to authorize the key.

If you have problems make sure your ssh config is set to allow keys! Refer to your distro’s help files for more information. In the config you can also disallow passwords all together. The only way to login would be with the use the keys. The down side is if you lose your local key. If you do this method, ensure you have a backup plan. Like another computer with access keys. In Slackware Linux the lines to look for are in /etc/ssh/sshd_config

PubkeyAuthentication yes
AuthorizedKeysFile      .ssh/authorized_keys
PasswordAuthentication no

Note that it becomes a pain if you generate multiple keys for multiple machines. There are ways of doing it, but it adds longer lines to your ssh commands. You can use the same .pub file on any other remote machine you wish to connect to. I don’t know for sure if it would be considered bad practice to do so, but I don’t see what problems would truly arise.

What’s the true benefit to this instead of saving time typing a password? Security. If an attacker can’t use a password (since many users passwords are weak) it would essentially eliminate their ability to gain SSH access. What do you think if the likelihood of the attacker to guess your key. Look at id_rsa. It’s a pretty big key to guess.

Samba (cifs) through SSH

Ever needed to work from home, but have the problem of using a Samba share on the server while at work, but not at home? Well here is a simple fix.

In my example I’m working on a “sandbox” from home. The folders I work in have files with more than one owner. This becomes a nightmare even when I ssh in. Some might think an NFS share would be better. Unfortunately with NFS you are stuck with the current file permissions. With Samba those file permissions are given to you. That may sound a bit confusing, so let me try to clear it up a bit. Let us say there is only one file in the Samba share. User “ender” has ownership of the file. I can’t alter it. When I login with Samba the file appears to be owned by me not “ender”. Now I can do my work and when I log out the file is still owned by “ender”… wow, I don’t think I did a good job there either. Lets just say that when in comes to file permissions, Samba is the way to go.

But I need to work over ssh? Only port 22 is open from the outside. No problem!

We simply need to create a ssh tunnel. For this we already know we need to connect to port 139 on “sandbox”, and we need a local port to connect to. I would say just make it 139 also. Unfortunately for me I’m also running Samba on my local machine, and I can’t do that. So any non used port will do. How about 1139?

ssh user@remotehost -L 1139:localhost:139

Simple as that. That will connect port 1139 on your local machine to 139 of the remote host. The “localhost” actually refers to the remote host. It’s saying connect 1139 to my local machine to the remote host’s “localhost” port 139. If you are actually connecting to a windows box on that network you can “bounce” off the linux host to the windows. For more information you can refer to a previous post: Secure VNC for free for more information.

Now comes the fun part. You have 1139 on your local machine tied to 139 on the server. Now to mount the share as a local disk.

As root we mount the share.

mount -t cifs //sandbox/www /mnt/sandbox/ -o username=<username>,password=<password>,ip=127.0.0.1,port=1139,uid=<your local UID>,gid=<your local GID>,file_mode=0770,dir_mode=0770

Fill in your Samba share’s username and password, then your local machine’s UID and GID. To find the UID and GID type:

cat /etc/passwd | grep <your local username>
cat /etc/group | grep users

This assumes your regular user is part of the “users” group.
It will show 2 numbers. UID is most likely 500 or 1000, and GID is likely to be 100.

After filling in the blanks hit enter and your set! This will use the local port 1139 through the ssh connection to 139 on the server. It may seem a little slow at first, but that may be from the old server I’m connecting to.

If you want to store the info in fstab try:

//sandbox/www    /mnt/sandbox     cifs        noauto,rw,username=<username>,password=<password>,ip=127.0.0.1,port=1139,uid=<UID>,gid=<GID>,file_mode=0770,dir_mode=0770          0   0

Now for some reason I can’t quite get this to work, but others seem to have no problem with it. You can add the mount line above into your /etc/fstab file so a regular user can mount. I did this, but it doesn’t work for me. I get an error saying “only ROOT can mount this”. If you get this error try:

chmod +s /usr/sbin/mount.cifs
chmod +s /usr/sbin/umount.cifs

Like I said, it didn’t work for me, however after creating the ssh tunnel I simply open a new terminal window, su to root and then type “mount //sandbox/www” and it works fine.

Also, the reason I don’t background the ssh connection is because if it drops you may run into some problems with trying to mount it again (or even trying to use umount). I had this problem and it gave me a head ache to try to fix it without just rebooting. I’m sure I could have forced an umount.cifs, but I didn’t try (actually I didn’t realize it was actually still mounted). When logging in I recommend running a command that continuously sends data like “top”. That will help prevent the connection from being lost. If the connection is lost you must umount the share, reform the ssh tunnel, and try again.

NOTE: If you are connecting to a share on a Windows 7 box you must open 2 ports, 139 and 443 (or so I’m told). To do this open up a few terminal windows and create two separate connections. After that I do not know as I have never tried.

EDIT NOTE: I wrote this some time ago and just now got around to posting it. I hope everything works fine for you as the mount works fine for me (except under fstab for some reason). Don’t forget that by typing the command into the shell it will be stored in your history. If the password is sensitive I would recommend clearing out your history after mounting the share.

Project: SSHT

SSHT is also known as Secure SHell Tracker. Think of it like a tracker for your ssh connections. I wrote it a long time ago to help keep track of all my connections. It has evolved a bit since then. As of this writing I’m at version 1.3. I know this program (more of a script right now) could be useful to many Linux admins. The problem? It is hard to find. I’m trying to get on the list at Google if you type “ssh tracker.” Unfortunately it only works if you type “SSHT” or “Secure shell tracker.” I hope in the future I can get this script out to the wild for everyone to enjoy. Check it out at TangoRangers.com.

ShopSavvy, Compare Everywhere, and SnapTell for Android

Some time ago I wrote that I was going to start writing regular reviews on cool apps for Android. Well I got side tracked. So today I’m going to talk about 3! ShopSavvy, Compate Everywhere, and SnapTell.

ShopSavvy and Compare Everywhere use the phone’s camera to scan barcodes! It’s pretty cool. I have both simply because they both have their own different databases. For example, what I like to do is go to at my local super store and see what movies I would like. I always cringe when I see an older movie for $25 or more. That’s when I scan the barcode. Now I can see where to go to get the better deal. Keep in mind that the local portions don’t do very well all the time. This is by no fault of the program or it’s writers. It’s just the way things are.

Below are screen caps from both programs. Thinking back when I did those shots, I don’t know why I didn’t check the same product to see how the results differ.

First up, ShopSavvy. (Click on the picture to see the full size!)
Picture Index:
1. Main Screen.
2. Scan the Barcode. See the Use Keyboard button. You can type in what you want to find!
3. It found the book just fine.
4. Two different local businesses were found.
5. And a local map showing where to go.
1ShopSavy_1  2ShopSavy_2  3ShopSavy_3  4ShopSavy_4  5ShopSavy_5

Now I forgot to take a picture, but ShopSavvy will take you to the website where you can see more on the product and if you really want to you could buy it right away. That part is the same as the other programs.

Ok, so ShopSavvy is pretty cool. Now check out these pictures for Compare Everywhere:
Picture Index:
1. Main Screen
2. Scan the Barcode
3. Get your local and online store options.
4. Just a scroll down from picture 3.
5. Lets check these guys.
6. Opened the browser and took me right there.
1Compare_Everywhere_1  2Compare_Everywhere_2  3Compare_Everywhere_3  4Compare_Everywhere_4  5Compare_Everywhere_5  6Compare_Everywhere_6  

Not to bad so far right? Now I want to talk about SnapTell. If my memory serves me well, this app was originally written for the iphone, but it’s the same thing in the end. The difference here is that you take a picture of the movie, book, or what ever, and SnapTell tries the find you a match. As you will see in the pictures below, I took an alright picture of the book and SnapTell still figured it out very quickly.

Picture Index:
1. The picture I took (This is an awesome book).
2. The results.
3. Took me right to the website I wanted.
1SnapTell_1  2SnapTell_2  3SnapTell_3

As you can see, all three of these programs are very cool. I use them quite often. Did you find an app like these and really like it? Let me know so I can share the information.