Archive for the ‘hacks’ Category.

Use rclone to get dropbox working on linux again

A while back, Dropbox dropped a lot of support for Linux, such as dropping XFS and EncFS, which broke a lot of users. It ended up causing problems for me at work because we use CentOS and all of the sudden, Glibc is now too old to even run dropbox headless. Eventually I gave up on Dropbox and started just using it for simple things through the web browser, but then I discovered rclone.

Using rclone, I was not only able to view everything in Dropbox (which by the way, my company uses Okta for single sign-on, and this still worked) but I was able to mount Dropbox to my local file system! For those of you familiar with webdav, this works in a similar way. When you “mount” Dropbox it doesn’t download anything like when you use the app. It all works online. Put files into the mounted folder, and they will upload.

Getting started is pretty easy, the following commands were taken from https://rclone.org/dropbox/.

rclone config
n) New remote
d) Delete remote
q) Quit config
e/n/d/q> n
name> remote
Type of storage to configure.
Choose a number from below, or type in your own value
[snip]
XX / Dropbox
   \ "dropbox"
[snip]
Storage> dropbox
Dropbox App Key - leave blank normally.
app_key>
Dropbox App Secret - leave blank normally.
app_secret>
Edit advanced config? (y/n)
y) Yes
n) No
y/n> n
Remote config
Use auto config?
 * Say Y if not sure
 * Say N if you are working on a remote or headless machine
y) Yes
n) No
y/n> Y
If your browser doesn't open automatically go to the following link: http://127.0.0.1:53682/auth
Log in and authorize rclone for access
Waiting for code...
Got code
--------------------
[dropbox]
type = dropbox
token = {"access_token":"BIG LONG TOKEN HIDDEN","token_type":"bearer","expiry":"0001-01-01T00:00:00Z"}
--------------------
y) Yes this is OK
e) Edit this remote
d) Delete this remote
y/e/d> y
Current remotes:
 
Name                 Type
====                 ====
dropbox              dropbox
 
e) Edit existing remote
n) New remote
d) Delete remote
r) Rename remote
c) Copy remote
s) Set configuration password
q) Quit config
e/n/d/r/c/s/q>

So I kind of cheated here, but basically once you are getting setup a new link will your browser, log into Dropbox and it will ask for rclone to be able to access Dropbox. Give access and your done. It is pretty easy. Now I named my dropbox dropbox, maybe dropbox wasn’t the best name to differentiate it, but oh well.

Once you get to this point you can do something like

rclone ls dropbox:

Which will get you a nice list of files you currently have in your dropbox.

Now for the fun part… mount.

There is a ton of information over here at https://rclone.org/commands/rclone_mount/ but really, all you need to do is

rclone mount dropbox:/ /path/to/mount/point &

You must background the process to get your shell back. The mount is only active while that program is running and it does not appear in your list of mounted drives in Linux. So running something like df will not show the mount point, but what ever user you are logged in as (or that ran the command) will see files when looking in that directory.

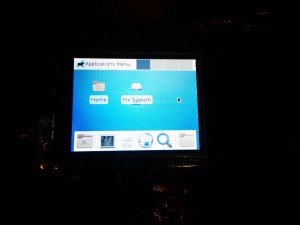
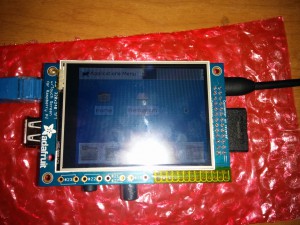
Adafruit touchscreen on a Raspberry Pi B running Slackware ARM.

I recently had the opportunity to get a friend a new Raspberry Pi Model B. I really like these, I have several all running Slackware ARM. While I have tried other distros, I find myself always going back to Slackware after a while for one reason or another, but that is a talk for another day. My friend decided he wanted to run Slackware on one of his Raspberry Pis, so I helped him out and get everything installed. Then I was presented with another issue. He wanted to use his Adafruit touchscreen. Now, Adafruit’s documentation and setup guides are really good, but only if you are running Raspbian (or a Debian based system). So that did present an issue, but one I wanted to solve.

Before I continue, please note that I did get this working (video and images at the bottom of the post), but I had to deliver the Pi back before I got a change to try again from scratch. This guide is based heavily off my best recollection of the steps I took, and may not be complete. If I’m missing something, or you can’t get it to work, let me know and I will try to help… or send me a screen so I can do this again.

Start with checking out this guide: https://learn.adafruit.com/adafruit-pitft-28-inch-resistive-touchscreen-display-raspberry-pi/software-installation it was helpful in getting everything going.

Now, download all the needed files:

wget http://adafruit-download.s3.amazonaws.com/libraspberrypi-bin-adafruit.deb
wget http://adafruit-download.s3.amazonaws.com/libraspberrypi-dev-adafruit.deb
wget http://adafruit-download.s3.amazonaws.com/libraspberrypi-doc-adafruit.deb
wget http://adafruit-download.s3.amazonaws.com/libraspberrypi0-adafruit.deb
wget http://adafruit-download.s3.amazonaws.com/raspberrypi-bootloader-adafruit-20140917-1.deb

Download and install deb2tgz (https://code.google.com/p/deb2tgz/). This will help you convert those deb files to tgz for Slackware.

Now convert those deb files to tgz (deb2tgz *.deb)

Then install (installpkg *.tgz)

Now, you need to make a copy of raspberrypi-bootloader-adafruit-20140917-1.deb and place it in another directory. Once there, run:

ar x raspberrypi-bootloader-adafruit-20140917-1.deb

This will explode out the archive. Find the file called data.tar.gz, and run:

tar -zxf data.tar.gz

Now there will be some new directories. One is called boot. Make a backup of you /boot directory, then copy everything in that new boot to /boot.

cp -r /boot /boot.bak
cd boot
cp * /boot

This will install the correct kernel that you need to use.

Next, open /boot/config.txt. The only line you need is gpu_mem=32.

Now, there are a few more packages you need to install. First is called evtest. I found an awesome slackbuild repository located over at https://github.com/PhantomX/slackbuilds.git, and we are going to install his evtest package.

git clone https://github.com/PhantomX/slackbuilds.git
cd slackbuilds/
cd evtest/
./evtest.SlackBuild 
installpkg evtest-1.32-x86_64-1root.txz

Notice how the arch listed in the Slackware package as x86_64, don’t worry, it works, just install it.

Next is tslib. Here is how I built and installed it (also, I cheated and did not build a Slackware package).

wget http://ftp.de.debian.org/debian/pool/main/t/tslib/tslib_1.0.orig.tar.gz
tar -zxf tslib_1.0.orig.tar.gz 
cd tslib-1.0/
./autogen.sh 
./configure
make
make install

Last, we need to build a package called xf86-video-fbturbo. (Forgive me, you may not need to run make in that first directory, but definitely in the src directory)

git clone https://github.com/ssvb/xf86-video-fbturbo
cd xf86-video-fbturbo/
./autogen.sh 
make
cd src
autoreconf -vi
./configure --prefix=/usr
nano xorg.conf 
make
make install

There, that was fun! Alright, lets edit a few more files.

Open /boot/cmdline.txt, and place this one line in there (it is the only line for me, you maybe different)

dwc_otg.lpm_enable=0 console=tty1 nofont root=/dev/mmcblk0p3 fbcon=map:10 fbcon=font:VGA8x8 rootfstype=ext4 rootwait ro

Then open /etc/X11/xorg.conf.d/99-calibration.conf (if the directory or file does not exist, create it!) and place this in the file.
Note the commented out items, I meant to experiment with them, I don’t remember if those options break anything, but I doubt it.

Section "InputClass"
    Identifier "calibration"
    MatchProduct "stmpe-ts"
    Option "Calibration" "3800 200 200 3800"
    Option "SwapAxes" "1"
EndSection
 
Section "Device"
        Identifier      "Allwinner A10/A13 FBDEV"
        Driver          "fbturbo"
        Option          "fbdev" "/dev/fb1"
#        Option          "SwapbuffersWait" "true"
        # `man fbturbo` to know more options
#        Option          "AccelMethod" "G2D"
EndSection
 
Section "Monitor"
    Identifier "Monitor0"
    Option "DPMS"
EndSection
 
Section "Screen"
    Identifier "Screen0"
    Device     "main"
    Monitor    "Monitor0"
    DefaultDepth 16
    SubSection "Display"
            Depth 16
            Modes "320x240"
    EndSubSection
EndSection

Lastly, open /etc/rc.d/rc.local and add these lines:

modprobe spi-bcm2708
modprobe fbtft_device name=adafruitrt28 rotate=90 frequency=32000000
export FRAMEBUFFER=/dev/fb1

I also recommend adding the export framebuffer to your user’s ~/.bashrc file. You need that before X will start.

I really hope I got this all right. Feel free to complain. Maybe I’ll get another chance to play with this again in the near future, and this time, I’ll get it right! I wish you all the best of luck! Cheers,

IMG_20150206_224415IMG_20150206_224423

If the video above isn’t loading, you can view it here: https://www.youtube.com/watch?v=KpzBYshxY9c

Netflix on Slackware

UPDATE! This doesn’t seem to be required anymore. Netflix should work fine as long as your Mozilla-NSS is up to date and you are running Chrome 39 or higher!

Getting Netflix to run in Linux has been in the news again. Before you had to use pipelight and wine to get everything running. Even then, I’ve heard it doesn’t even work all that well. I never did try it myself because I run Slackware64 without multilib, so I can’t even execute 32bit applications like wine.

Fortunately, some very smart people have figured out how to get real native Netflix working in Linux. Many of the sites out there show you how to do it with Ubuntu, but that didn’t work for me, which I’ll explain later.

Lets get going. First you need Chrome 37 or newer. Snag the build scripts from the Slackware extras section: http://mirrors.slackware.com/slackware/slackware64-14.1/extra/google-chrome/. Change if you are not running 64bit. This also works (from what I’m told) if you are running Slackware 14.0

Next snag the latest deb from Google, https://www.google.com/chrome/browser/ and select either the 32bit or 64bit download depending on what you’re running.

After running the build script, you will have a package ready to install in your /tmp directory. The best part of the chrome build script is it will figure out the version number of Chrome before building the package. Install the package using installpkg.

Before moving on, I want to explain the difference between the Ubuntu and Slackware setup. As I started writing this, I had a package that was just a tiny little bit out of date. One of the requirements is libnss. At the time I was running version 3.16 and you need 3.16.4. I found this great post over on linuxquestions.org which gives instructions on building the newer version of libnss. Just before posting this I found that the wonderful Slackware maintainers updated it for me! Just make sure to fully patch your system and you will get mozilla-nss-3.16.4.xxxxx.txz. If you actually read this entire paragraph, I’m impressed. Thanks for making it worth my time writing it.

Start up Chrome and go to https://chrome.google.com/webstore/detail/user-agent-switcher-for-c/djflhoibgkdhkhhcedjiklpkjnoahfmg and install. Once installed, right click on the new icon and select options. Here we are going to setup a new custom User Agent that will allow Netflix to play. Put the following options in the fields.

New User-agent name: Netflix Linux
New User-Agent String: Mozilla/5.0 (Windows NT 6.3; Win64; x64) AppleWebKit/537.36 (KHTML, like Gecko) Chrome/38.0.2114.2 Safari/537.36
Group: Chrome
Append?: (defaults are fine)
Indicator Flag: IE

Be sure to select your new User Agent and then login to your Netflix account. Once in go to your account settings and select the option to use HTML5 over Silverlight. Enjoy watching Netflix in Linux!

How to use Redmine when your Ruby is too new

Recently my work switched to Redmine to keep track of our projects and such, I loved it so much, I wanted to use it at home for my personal projects. Seriously, if you have never used it, give it a try, you won’t be disappointed. However, there is a problem that I ran into when setting it up at home, my Ruby was too new! At the time of this writing Redmine version 1.2.2 was the current stable, and required Ruby 1.8.6 or 1.8.7. My server came with 1.9.1! I could either downgrade and risk possible incompatibility problems, or I could take another approach. After days of Goggling, I found a solution.

Check out https://rvm.beginrescueend.com/rvm/install/

I recommend the single user install. I did it with no problems. Things get a bit tricky when using RVM, so I decided to create this Quick and Dirty Guide.

How to Install and Setup Redmine with RVM

Be sure to pay attention to directories, I will make notes to help make things easy. Also, I recommend trying this out in a VM or a dev box. Please read the HowTos on redmine.org and do some research and testing before following this guide.

Note: This was done running Slackware 13.1. I do NOT use sudo on my machines. If you get a permissions error you can use sudo if your Linux distro is setup for it. The first part of this I did as the root user. If you use sudo, type ‘sudo su -‘ to become full root. If you see Redmine (with the capital R), I’m referring to the Redmine program or website. Lowercase, is the user redmine.

After downloading the source from redmine.org extract it and rename the folder to redmine, you don’t have to do this, it’s just how I did it.

Setup a Redmine user

This user doesn’t need remote access, or the ability to login directly. We are going to create a new user and group for Redmine to run under.

groupadd redmine
useradd redmine -g redmine -m

Now set permission to where you extracted Redmine to. We are going to give everything to the redmine user and group.

chown redmine:redmine redmine/ -R

Now you need to su – redmine. Make sure you are in the redmine user’s home directory. Usually /home/redmine/

Setup RVM

Now that you are the redmine user and in their home directory, it’s time to install RVM. Be sure to check out their website for full and up to date information. The information listed here maybe out of date!

Lets install RVM for single user use. You are welcome to use the multi-user version, but this way worked just fine for me. Once again, make sure you are in the redmine user’s home directory.

bash < <(curl -s https://raw.github.com/wayneeseguin/rvm/master/binscripts/rvm-installer )

This will get the installer going. Once it finishes, run this:

echo '[[ -s "$HOME/.rvm/scripts/rvm" ]] && . "$HOME/.rvm/scripts/rvm" # Load RVM function' >> ~/.bash_profile

Now logout. Log back in as the redmine user. and type:

type rvm | head -1

You should get back rvm in a function. If not, something went wrong. Try the commands listed above again. If you get an error about a broken pipe, don’t worry about it. I got it once, but never again. I have no idea why.

If you do get back the good news type:

rvm install 1.8.7

This will install ruby 1.8.7! Once it is complete type:

rvm use 1.8.7

If you don’t get back any errors, type:

rvm use 1.8.7 --default

This will set that ruby version as your default (only for the redmine user!) RVM is now setup. Good job!

Install Some Ruby Gems

Now that RVM is setup and Ruby 1.8.7 is installed, we need to setup some gems for ruby. First step is getting the correct version of RubyGems installed. As per the Redmine documentation, we want version 1.3.7. I find the easiest way of doing this is to grab their .tgz file. Once you get it (you can also find a list of versions available for download here. Extract it, and run setup.rb.

wget http://rubyforge.org/frs/download.php/70696/rubygems-1.3.7.tgz
tar zxf rubygems-1.3.7.tgz
ruby rubygems-1.3.7/setup.rb

It should only take a second or two to install. Once it’s complete there are two more gems that need to be installed before continuing. It is easy and straight forward. Note: If your system appears to freeze when running the commands below, do not worry. It’s working in the background a may take a minute or two.

gem install rails -v=2.3.11
gem install -v=0.4.2 i18n

Setup MySQL

Assuming you are still the redmine user and MySQL is setup and ready to go, these next steps are very easy and were taken right from Redmine’s website. Follow the steps below.

mysql -u root -p
create database redmine character set utf8;
create user 'redmine'@'localhost' identified by 'redpass';
grant all privileges on redmine.* to 'redmine'@'localhost';
flush privileges;

Take note of redpass. Change it to the password you want to use!

Log out of MySQL and stay logged in as the redmine user. Change directory to where the redmine program is stored. For this example, and the rest of the article, I’m going to assume it’s in /srv/redmine

Copy config/database.yml.example to config/database.yml then edit config/database.yml to include your db setup (under production. You can remove the others)

Copy public/dispatch.cgi.example to public/dispatch.cgi then changes first line to the path of the redmine user’s ruby location (/home/redmine/.rvm/bin/ruby in my case)

public/dispatch.cgi needs to have execute permissions. If it does not, type: chmod 755 public/dispatch.cgi

Uncomment NV[‘RAILS_ENV’] ||= ‘production’ in config/environment.rb

Now we need to setup MySQL access. Below are four (4) commands that will do all this including building the MySQL gem. Please note the path to mysql_config. Make sure this matches your setup!

rake generate_session_store
gem install mysql -- --with-mysql-config=/usr/bin/mysql_config
RAILS_ENV=production rake db:migrate
RAILS_ENV=production rake redmine:load_default_data

If any of these fail, something may have gone wrong with RVM or MySQL. Check you meet the minimum qualifications listed on Redmine’s website and your paths are correct.

Setup Passenger

Passenger is designed to run as an apache module to keep Ruby of Rails running. If Redmine isn’t used for a while, Ruby of Rails may stop running, it’s not a big deal, it just means it will take a second longer to access your first request. It’s easy to setup, and can be done as the redmine user. So make sure you are still logged in as your redmine user.

I’m running version 3.0.11 or Passenger, you are welcome to do the same. There are only three (3) simple steps involved. So I put them below. Just give it some time to build, it can take a few minutes.

wget http://rubyforge.org/frs/download.php/75548/passenger-3.0.11.tar.gz
tar zxf passenger-3.0.11.tar.gz
./passenger-3.0.11/bin/passenger-install-apache2-module

Once the build finishes there are some lines you need to add to your apache.conf file. They are listed above, they are easy to see. Now, depending on your Linux distro, there are several names and locations for this file. You will need root access to edit the Apache config.

At this point you can stop being logged in as the redmine user. Go back to being root (or your regular user with sudo access)

Setup Apache

This setup worked well for me, I would recommend reading up on Apache config options at http://www.redmine.org/projects/redmine/wiki/HowTo_configure_Apache_to_run_Redmine

The page is a little hard to understand when talking about mod_fcgi and mod_fastcgi. You do NOT need them. They maybe faster, but I find that mod_cgi works just fine.

I’m getting a bit lazy here, and I don’t feel much like going into a lot of explanation on all the options you can use in Apache. Below is a sample of what I used.

<VirtualHost *:80>
   ServerName redmine.<YOUR-DOMAIN>.com
   ServerAdmin webmaster@<YOUR-DOMAIN>.com
   DocumentRoot /srv/redmine/redmine/public/
   ErrorLog /srv/redmine/redmine/log/redmine_error_log
   <Directory "/srv/redmine/redmine/public/">
      Options Indexes ExecCGI FollowSymLinks
      Order allow,deny
      Allow from all
      AllowOverride all
   </Directory>
</VirtualHost>

Obviously there are changes you need to make, like ServerName and ServerAdmin. Note how all the directories start with /srv/redmine/, Update it to where you extracted the Redmine program.

All done!

At this point you should just have to restart apache and you are good to go! Assuming you actually read the Redmine documentation, you can now login as admin (password admin) and give it a go. The first thing I recommend doing is creating a new Admin Level User and removing the default admin. If you get an Internal Error 500 when trying to add a new user, then something is definitely wrong. Check the redmine_error_log and production.log file (both should be in the same directory). If you see something about an error with US_ASCII, then Ruby is not running out of the redmine user’s home directory. Go back through and double check your settings.

I have been told that creating the redmine user in the fashion shown above can create a security risk. As root open /etc/shadow in your favorite editor. At the bottom of the list will be the redmine user. You may see something like:

redmine:!:12585:0:99999:7:::

If you change the exclamation point to an asterisk, it disables the account. That way you can not log into it remotely. Also, if you really want to play it safe, you can edit /etc/passwd also. Just change the last part of the file from /bin/bash to /bin/false. However, by doing this you will not be able to login, or su to that user.

Well?

Did this guide work for you? Do you have any suggestions that may work better? I would love to hear! Feel free to post a comment and let me know how it worked for you, and let me know what Linux distro and version you are running. Thank you.
Hacking moviebeam

Some time ago I posted in a forum that I was going to hack a moviebeam box.  Well lets put it this way, it’s kind of a waste of time.  Granted, they say it’s unhackable… not true. I found a great site at http://moviebeam.wikispaces.com/ that gave me a lot of good info.  However, upon my own experiments I have found that it’s a HUGE pain in the ass to try to retrieve movies.  The problem is when you hot swap the hard drive you only get to use it for about 3 min.  This is not enough time to copy a movie off the drive.  However, I was able to start playing a movie… at least once.  It appeared to be in a standard MPEG-2 format, just like DVDs.  So, if you do what is explained on the link above you can get movies.

NOTE! I do not condone stealing! It’s wrong! I did this as an experiment to see if I could do it! It was my first attempt at hardware hacking and I think I did a pretty good job.  Below is a way (only a theory, I did NOT test it) to get a movie.

After you have hot swapped the drive setup apache or an ftp server to point at the directory (ie /mnt/sdb2) so you can see the file listings.  Then from another computer use

wget 

then once the drive stops working repeat the hot swap and use

wget -c 

and it should continue where it left off.

I did NOT try this, it’s only a theory.  I have stopped my attempts to hack the moviebeam box (mostly because the last thing I want is a lawsuit).  If you are able to hack it and steal movies… well shame on you.