Posts tagged ‘linux’

Tetherbot, Android, and Slackware How to

After trying to get my Android (aka, T-Mobile’s G1) working on my Slackware laptop and having many problems I looked for help at androidcommuinity.com. Even tho they didn’t technically help me solve the problem they were still a great help, and there quick replies kept me thinking of what the problem could be, and I thank them for that. In the end it was my own fault. Here’s the story.

My laptop runs Slackware 12.0 with a new custom 2.6.28 kernel and there was were the problem was. As it turns out I failed to turn on and modularize certain USB functions, now I’m unsure of what I enabled that made it work.

First, if you think it’s a problem with your kernel check your USB device settings. I use the make menuconfig when I build kernels, if you use xconfig it may appear slightly differently.

Check under Device Drivers –> USB Support. I turned on just about everything and modularized just about every USB device, don’t forget to turn on USB Gadget Support I turned on the top 3 options, they are for debugging and also Serial Gadget was modularized. Click Here to download my .config file. This file is in the root of where you extracted your kernel (usually /usr/src/linux-2.6.28/). Be sure to rename the file from DaijoubuKun.Android.config to .config otherwise you will need to tell your kernel to use that file. Quick note: I know I have a lot here that does not need to be turned on, I like large kernels with lots of modules.

UPDATE!
Put your 50-android.rules file in /etc/udev/rules/ and chmod it to 755!
Also in your kernel build make sure you turn on USB debugging mode!!!

If you think your kernel is OK check out graha.ms. There is a lot of the stuff your going to need to know there.

Now, at this point I’m assuming you visited the link above but your Tetherbot still isn’t working. This may be because the commands google gives may not work in Slackware. I wrote 4 lines more designed in Slackware’s udev style. Below are 8 lines. I’m sure you only need one, but it didn’t hurt me none to use all 8, the bottom 4 are mine. Here is my 50-android.rules

SUBSYSTEM=="usb", SYSFS{idVendor}=="0bb4", MODE="0666"
SUBSYSTEM=="usb_device", SYSFS{idVendor}=="0bb4", MODE="0666"
SUBSYSTEM=="usb", SYSFS{idVendor}=="0bb4", MODE="660"
SUBSYSTEM=="usb_device", SYSFS{idVendor}=="0bb4", MODE="660"
SUBSYSTEM=="usb", ENV{DEVTYPE}=="usb", SYSFS{idVendor}=="0bb4", MODE="0666"
SUBSYSTEM=="usb", ENV{DEVTYPE}=="usb_device", SYSFS{idVendor}=="0bb4", MODE="0666"
SUBSYSTEM=="usb_device", ENV{DEVTYPE}=="usb", SYSFS{idVendor}=="0bb4", MODE="0666"
SUBSYSTEM=="usb_device", ENV{DEVTYPE}=="usb_device", SYSFS{idVendor}=="0bb4", MODE="0666"

I know it’s got to be overkill to have 8 lines in there, so if you figure out which is the one that works post it in a comment and I will edit this to show that line with credit to you.

NOTE: When you plug in your phone you will be asked if you want to mount the sdcard to your computer. SELECT NO! According to rynosaur of androidcommunity.com.

Note, to make things easier copy the files is your tools/ directory (from the android sdk) to /bin. This way you do not need to go to the download directory to run the adb program. You can also copy the libs to /bin/lib

Now run adb devices. You should get some out put like

List of devices attached
HTxxxGZxxxxx    device

If you do then we are ready to go!
If not did you remember to run on USB debugging?
Start the Tetherbot program and hit Start Socks
Now type ‘adb forward tcp:1080 tcp:1080‘. This will forward and thing you send to ‘localhost:1080’ to the phone.

Using nmap I found that Tetherbot uses socks 5 with no authentication. This makes things a bit easier. Once you have gotten this far you are ready to setup your web browser to use the socks proxy. I have done this in SeaMonkey and Firefox (haven’t tried anything else yet) so here are the instructions for FireFox 3.0.x (should stay about the same for future versions).

Go to Edit –> Preferences –> Advanced (top tab) –> Network (lower tab) –> Connection Settings (button).
Select ‘Manual Proxy configuration‘ and put localhost in SOCKS Host and port 1080 in port. ONLY put that information in the SOCKS Host! Do NOT put it in HTTP Proxy! Be sure to select Socks v5 and (this may not be necessary) remove anything in the field No Proxy for:
Here is a picture:
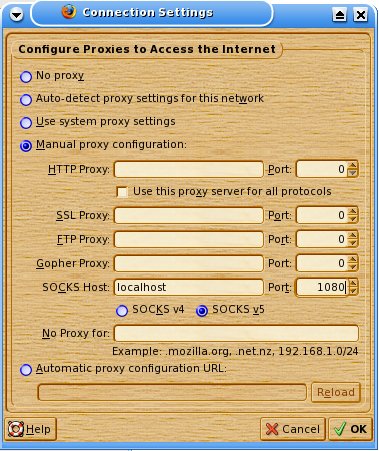
proxy settings
Once you do that everything will go through your phone. I did read that there is a 1GB per month limit on the phone. I do not know if this is true or not. I’m only going to use Tetherbot when I’m doing a service call, I need a file and there is no other way to get online.

Lastly, just as quick bit of info. I live in an area where T-Mobile doesn’t have 3G! It sucks, but I’m told it’s coming later this year. It damn well better with how much I pay every month for this thing. I ran a bandwidth test through the EDGE network (it’s like 2.5G) and below is my speed.
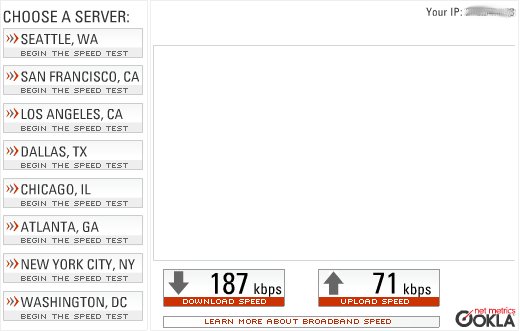
bandwidth test
Granted, I only ran the test once, and early in the morning. Plus I don’t think the phone was designed to have these sort of things run through it, but it will have to do for now. P.S. Thanks for the awesome speed test program Speakeasy.

Special note: I could be wrong, but it seems that after you put the required information into 50-android.rules you may need to either restart or run /etc/rc.d/rc.udev restart to restart the udev service. You may also need to replug in your phone, make sure you don’t mount your sd card as it may cause tetherbot to not function properly.

If this helped you in anyway please let me know. If it didn’t help post your problem and I will try to help.
Using PHP to upload an image and rename it.

If your like me you have scoured the internet trying to find a simple php script that will let a user upload an image and then rename the image to something unique. Well I have just the solution.

First, the only real requirement is PHP and a web server (I use Apache).

Create a new file, lets call it ‘image_upload.php’
At the bottom of the page we are going to put in a basic form to give a browse and upload button.

<form action="./image_upload.php" enctype="multipart/form-data" method="post">
Select Image to upload
<input name="thefile" type="file" />
<input name="submit" type="submit" value="upload" />
</form>

The form name isn’t important. The action is. That is the name of the file that needs to be accessed when the upload button is clicked.
Input type is very important, and so is the name.

Now that we have a starting point go to the top of the file. Just to make it easy I’m going to paste the entire code here then explain it part by part.

if(isset($_POST['submit']))
{
 
	$tmp_name = $_FILES['thefile']['tmp_name'];
	$newarray = explode( ".", $_FILES['thefile']['name']);
	$thecount = count($newarray);
	$fileprefix = time() . "." . $newarray[$thecount - 1];
	move_uploaded_file($tmp_name, "../img/$fileprefix");
	exit();
}

To start the if statement at the top is to ensure that the ‘submit’ button was hit before running the script.
The ‘$tmp_name‘ variable is used to get rid of that damn array.
$newarray takes the file’s real name (see note below) and explodes the array into several smaller arrays by the ‘.’. For example, if the file uploaded it called ‘best.friends.pic.jpg’ it breaks that name up to ‘best’, ‘friends’, ‘pic’, and ‘jpg’. Trust me, this is important (If you don’t understand how arrays work I recommend doing some research and learning).
The next line I use the count function. This will help in the event there is more than one ‘.’ in the name of the file being uploaded.
Now to create the new name of the file. $fileprefix equals the time of the upload. This works well, it will grab the time from the server and use it for the file name. Then it adds a ‘.’, then adds the suffix of the file (example: jpg)
Time to move the uploaded file. In my example I added the directory before the newly created file name. This will go back 1 directory and then to ‘img/‘.
Lastly, we use the ‘exit();‘ function. This is so that after the file has been uploaded the script stops. If you remove the function it will display the upload form again.

NOTE: There is a reason (although I don’t know it) on why there are 2 arrays. It seems to me that the first ($_FILES[‘thefile’][‘tmp_name’]) holds 2 parts, a pointer for ‘thefile‘ and the temp name php gives files before we do something with it, and the second ($_FILES[‘thefile’][‘name’]) contains the original name of the file.

btw, make sure apache has full access to the folder you are uploading images to.
For example, if this is on your own server check /etc/apache.conf (or httpd.conf) for the user and group apache runs under. This is usually either ‘nobody‘ or ‘apache‘.
If you have SSH into your server (or are sitting infront of it) goto the directory your files are being sent to and type

chown apache.apache img/ -R

This will give both user and group ‘apache‘ access to write files.

p.s. I will be creating another script here that deals with multiple picture uploads.

Secure VNC for free

Here are my instructions on how to get VNC in KDE 3.5+ working through an SSH tunnel. It’s easier than you might think.

To start all you need is 2 or 3 Linux machines with OpenSSH installed. Most distros come with it (although I know Ubuntu does not).
NOTE: All my machines run Slackware 12.0 or higher.

Step 1 – Setup the host.
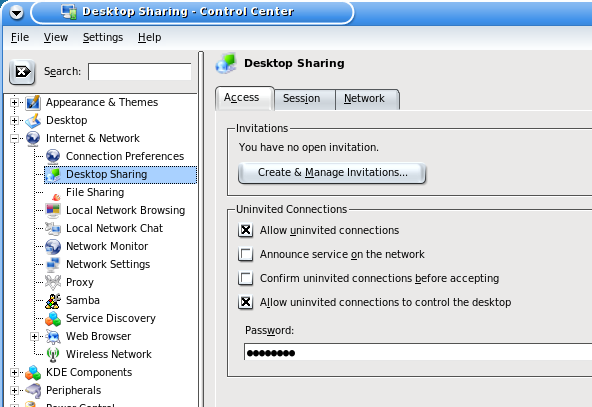
This is fairly simple, open up you Control Center, and find Desktop Sharing. Just look at my picture below and see the settings I would recommend for this.
settings
Just make sure you set a STRONG password!

Now comes the fun part. Creating the SSH tunnel. By default the VNC connection is on port 5900.
For this example you have 2 computers. Your at a coffee shop with free wifi but your smarter than everyone else, so your going to use encryption to your home desktop and surf the internet from there.
Your home computer (lets say) has a domain name. For my examples it will be daijoubu.net, and your internal computer is 192.168.1.2.
Make sure you set your router to forward port 22 (the SSH default) to 192.168.1.2
Open up a terminal (some times it’s called Konsole) and type:

ssh dkun@daijoubu.net -L 5931:localhost:5900

The user name I’m using is dkun, just put in your user name
You will be prompted for your password, after entered you have formed the SSH connection. What this command does is it takes all traffic from your desktop port 5900, and forwards it to your laptop (at the coffee shop) to localhost port 5915.
Seems complicated, but trust me, it works!
Now open up Krcd and type

vnc:/localhost:5915

Just as shown below.
window1
If you have 3 computers. For example, you don’t forward to your desktop (for security reasons) but you do forward to a file server. Lets say your file server is 192.168.1.3 and your desktop if 192.168.1.2 type:

ssh dkun@daijoubu.net -L 5915:192.168.1.2:5900

This will form the SSH tunnel to your server (192.168.1.3) then forward port 5915 from 192.168.1.2 through the SSH tunnel back to you.
Reminder: Doing it this was results in plain text from 192.168.1.3 to 192.168.1.2. This is only a problem if you don’t trust your internal network!

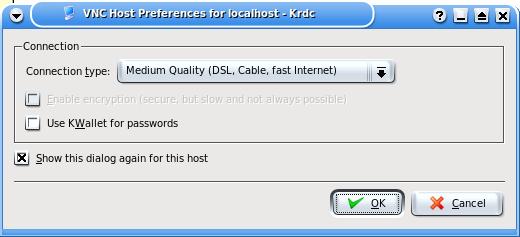
From here is gets simple, after you click Connect you will be prompted for the following window.
window2
These are the settings I recommend for over the Internet, VNC can take a lot of bandwidth.
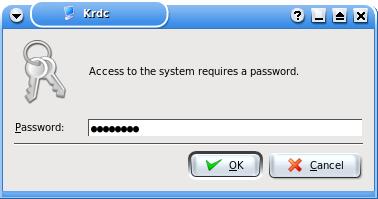
Next you will get a password prompt, type in your password and hit OK
window3
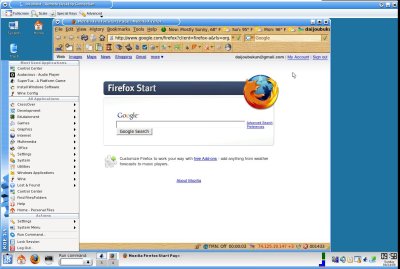
Your remote desktop will appear! if you look quickly you will see this at the bottom right of the screen
window4
That’s it! Now you can use your remote desktop over a secure connection!
window5
WARNINGS! If you attempt a connection without the SSH tunnel your passwords will be sent in plain text! That is BAD!
DO NOT FORWARD PORT 5900 ON YOUR ROUTER!

Extra Notes: If you do not have a domain name to work off of, you can put in an IP address after the username@, make sure it’s an internet IP address, 192.168.1.2 will NOT work
If you don’t have a static IP address you can use dyndns to get you one. They are really good, but if your IP changes you will have to update your opendns account. I would recommend checking before you head out.

Special Thanks to Spyder_3lite of UCoD.com. If it weren’t for you showing me something way cool with SSH, I never would have been able to do this.

Note: This was originally written on my other site Daijoubu.net. I have moved it here for better indexing from Google. ^_^