Use Battery Widget to fix possible battery issues after installing CupCake

Like so many out there my battery started acting funky after I installed cupcake. Mine was an automatic update and after it downloaded my battery was at about 70%. This was apparently a bad thing. It seems everyone who installed cupcake with a low battery has tried to charge it but it never seems to reach 100%. Some say to just pull the battery, some say use the phone until it dies then charge. I did both with no success.

Before I continue with how I solved the problem let me first give some information about how this all came to be. My battery would stop charging (or so I thought) at about 87%. While using the phone throughout the day I noticed that the battery level didn’t drop below 87% for quite some time. This told me that there is nothing actually wrong with my battery and must be related to the phone (I wish I realized that before getting a replacement battery from HTC, whom by the way has excellent customer service!).

So here is what I did to solve the problem. Granted I did this only a couple of days ago. The first day of charging 100%, the next, about 97%, the third, 100% (that’s today). I will keep track of the battery level throughout the next week or so and update this post. First, open your Market and search for “Battery Widget”, for me it was the third in the list. Make sure you get “Battery Widget” and nothing else. Install, then place it on your desktop. You will get an icon that looks like this.
icon
The program does add a couple nifty features. Just click on it and you get:
screen
The top and bottom option will load into new windows (these same things are found in your Settings menu.)
sound & display   Security & location
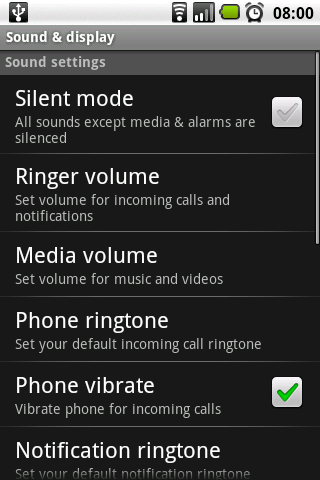
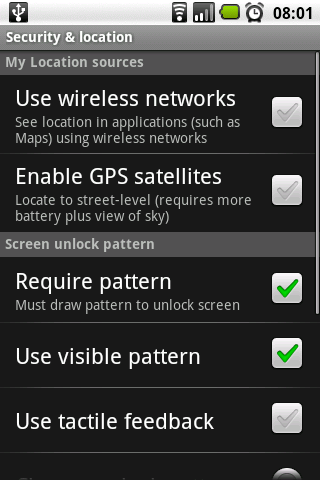
If you hit wifi, it will just turn your wifi on, it doesn’t take you to your settings menu.

Did Battery Widget fix your phone’s battery issue? Hit the comments and let us know!

UPDATE! Well it seems this really didn’t solve anything for me. Damn, I was very hopeful it would. Guess I need to either get that giant extended life battery or manually reinstall cupcake.

UPDATE! … again… Here’s the thing. If you tried pulling the battery, draining it, or running Battery Widget and none of those worked try to reinstall cupcake. I have even tried that and it didn’t work for me. Apparently I need to install an older version then to cupcake again. For me it’s not a big enough of a deal to bother going through that headache.

Check out Android Central on instructions and links. Please keep in mind that before you can install you must turn the phone off then back on using the home + power button! That will not restart it! Turn the power off then home + power for it to start properly! I wish everyone the best of luck in this matter. I just hope when my 220mAh battery arrives I won’t have any problems… and it did! I would highly recommend the battery, the case makes the back speaker quieter, but I’m sure I can fit that with a plastic tube inside the case… that is, if I ever get around to it.

Dynamically add form fields using javascript and DOM with dynamic post method

Lets say you need to add some extra text fields but you don’t want to write a bunch of code. I not only have how to quickly and easily add the input fields, but also how to take the data and put in into a MySQL DB!

I start with creating the DB. Lets call the table ‘phone’. We need 3 rows. ‘idx’ int(10) with Auto Increment and primary key. ‘name’ varchar(30), and ‘numb’ varchar(20). You can setup the db how ever you choose. I create the idx so that I have a key field.

Now we need some javascript.

var counter = 0;
Start a counter. Yes, at 0
function add_phone() {
    counter++;
// I find it easier to start the incrementing of the counter here.
    var newFields = document.getElementById('add_phone').cloneNode(true);
    newFields.id = '';
    newFields.style.display = 'block';
    var newField = newFields.childNodes;
    for (var i=0;i<newField.length;i++) {
        var theName = newField[i].name
        if (theName)
                newField[i].name = theName + counter;
// This will change the 'name' field by adding an auto incrementing number at the end. This is important.
        }
        var insertHere = document.getElementById('add_phone');
// Inside the getElementById brackets is the name of the div class you will use.
        insertHere.parentNode.insertBefore(newFields,insertHere);
}

Now I like to put that in a seperate .js file, but you can add it to your HTML HEAD tag.

Next we need to build the form.

<form name="add_a_phone" action="<?php echo $_SERVER['PHP_SELF']; ?>" method="post" enctype="multipart/form-data">
<fieldset>
<div id="phone">
    <input type="text" name="phone_0" value="" />
    <input type="text" name="phone_num_0" value="" /><br>
</div>
<div id="add_phone" style="display: none;">
    <input type="text" name="phone_" value="" />
    <input type="text" name="phone_num_" value="" /><br>
</div>
<input type="button" id="add_phone()" onclick="add_phone()" value="Give me more fields!" /><br>
<input type="submit" name="submit" value="submit" />
</fieldset>
</form>

Notice how in the input button field that the ‘id’ and ‘onclick’ are the same. That’s important, and yes you do need the brackets for some reason.
Also note that the form name can NOT be the same as any div id!!! I keep making that mistake.
You will need some way of checking how many fields were added when you get to your ‘if(isset($_POST[‘submit’))’ statement. This gets a little messy.
Because I like my forms to go back to this page and check if submit was clicked we need to put some php code at the very top.

<?php
    if(isset($_POST['submit']))
    {
        echo "You clicked submit!<br>";
        echo "Here is your data<br>";
        echo "<br>";
        if ($_POST['phone_num_0'])
        {
                $continue = FALSE;
                $i = 0;
                while ($continue == FALSE)
                {
                    if (isset($_POST['phone_'.$i]))
                    {
                    echo $_POST['phone_'.$i] . " = " . $_POST['phone_num_'.$i] . "<br>";
                    $phone = $_POST['phone_'.$i];
                    $phone_num = $_POST['phone_num_'.$i];
                    $query = "INSERT INTO phone (idx, name, numb) VALUES ('NULL', '$phone', '$phone_num')";
                    $result = mysql_query($query);
                }
                else
                {
                    $continue = TRUE;
                }
                $i++;
            }
        }
    }
?>

Obviously I left out some information. Like connecting to your DB. I’m assuming you already know how to do that.

I first wrote this on my main page. This post is almost a copy/paste from the main page. I like adding it to the blog since it gets better indexing from search engines and hopefully the information will be useful to you. On the main page there is also a working example so you can see how it all ties in. Check it out Here

Questions?

War Driving with WifiScan for Android

About once a month I’m going to do a write up on an featured Android Application. I love my Android phone and I have been recommending to all my friends to get one. So The first one I’m doing is called wifiscan. Enjoy.

I’ve been a fan of War Driving for a long time. If your unsure of what War Driving is let me explain. All you do it get a good wifi card (one with external antennas are even better) and drive around town looking for open networks. Keep in mind 2 things. For starts, I don’t actually do this anymore because I have the net on my Android and an actual cell card so I get access anywhere I go. Second. Some consider it illegal to scan for networks. This is not true, as long as you don’t use the network without permission from the owner!

I use this program quite a bit on my phone since currently where I live 3G is not available and I need to use EDGE. It’s not slow, but trying to show a friend the new monitor I was to get on newegg.com takes a while to load. We are usually at coffee shops so I use wifi scan to ensure I’m connecting to the correct wifi. Also the program does have a couple limitations. When exporting a kml file (for google earth) it can cause the Android to think the program has frozen. It hasn’t. Actually the Android is just show at writing files, click wait and deal with it. Also it only scans once every 3 seconds. Most scanners you would use on a laptop scan many times per second depending on what you card can handle. Therefor this doesn’t work well when shooting down the freeway at 70MPh nor driving 25 through a neighborhood. It’s not perfect, but I still like it.

Please note that I have blurred out any information that could compromise the security of anyone’s network or location.

To start I love the speed and direction that is shown. I tried to take a picture when I got to an open stretch of road with no one near me, but the picture turned out a little blurry. I’m sure you get the gist of it.
phone1

Just so show how cool this program is I exported the kml file and loaded it in my google earth. It doesn’t exactly pinpoint the exact location (like what house it’s in) of the network, but it does a good job none the less.
ge1ge2
The red pins are encrypted networks and green are open. You can even toggle it to show only encrypted or only open networks. Here are 4 pics that should be helpful. Once again I’m sorry that my picture taking abilities are not very good.
bothoptions
reggreen
Did you see my battery drop? That does happen when I get off a long phone call and start using the phone for other things.

Anyways, even if your not a War Driver I still recommend this program, it’s a lot of fun. You can download it from the Android Market.

Check out the developers website at www.waterflea.com/android.php

Using Javascript to hide single/multiple div tags with the same name

Update (March 25th, 2009):
I have created a page on the main site so that you can see how the code works, it may be easier to read than this. Check it out here

After scouring the net for information I finally got my answer from JimmySeal at TechGuy.org. Turns out the process is very simple.

In my first example I want to hide just one div tag when a check box is clicked. The process is a simple one, all we need to do is create a div with an id argument. Like div id=”hideme”. I prefer to use external js files to hold my javascript functions. Lets call it junctions.js. In this file lets put this bit of code.

function toggle_visibility(hideme)
{
	var e = document.getElementById(hideme);
	if(e.style.display == 'block')
		e.style.display = 'none';
	else
		e.style.display = 'block';
}

This will hide the div tag with id hideme
So in my html file I have something like this. (My example is in an input form)

<b>Show the field</b><input type="checkbox" name="a_name" value="a_name" onClick="toggle_visibility('hideme');">
<div id="hideme" style="display:block;">
	<b>was hidden</b><textarea name="some_name" cols="40" rows="5"></textarea><br />
</div>

Notice that the div id and the onClick functions are the same name, hideme. That’s it! How when the box is checked it will hide that one div tag.

What if you want to hide multiple div tags. Unfortunately the above script will not work simply because you can’t have more than one div id per page. You must use div class.

Open up your functions.js file and put this in.

var hidden = false;
function getElementsByClass(searchClass, domNode, tagName) {
	if (domNode == null) domNode = document;
	if (tagName == null) tagName = '*';
	var el = new Array();
	var tags = domNode.getElementsByTagName(tagName);
	var tcl = " "+searchClass+" ";
	for(i=0,j=0; i<tags.length; i++) {
		var test = " " + tags[i].className + " ";
		if (test.indexOf(tcl) != -1)
		el[j++] = tags[i];
	}
	return el;
}
 
function toggle_hideme()
{
	hidden = !hidden;
	var newDisplay;
	if(hidden)
	{
		newDisplay = 'none';
	}
	else
	{
		newDisplay = 'block';
	}
	var hellos = getElementsByClass("div_class_name", null, "div");
	for(var i = 0; i < hellos.length; i++)
	{
		hellos[i].style.display = newDisplay;
	}
}

Now for the form code example

<input type="checkbox" name="a_name" value="a_name" onClick="toggle_hideme('div_class_name');">
<div class="div_class_name">
	Blah Blah Blah
</div>
<div class="something_else">
	What ever is here will not disappear!
</div>
<div class="div_class_name">
	more blah blah blah
</div>

The only thing you need to pay attention to here is div_class_name just change it to what ever you want to call your div tag.

EDIT NOTE:
I just want to say that I’ve been getting a lot of hits here, but no one leaves me any comments. How do I know if this is helpful? Please leave a comment. I won’t sell your e-mails or anything. If you so desire enter in a fake e-mail, I don’t care. I just want to know. Thank you.

UPDATE!
http://blog.tangorangers.com/2009/08/using-javascript-to-hide-singlemultiple-div-tags-with-the-same-name-part-2/

Insert MySQL query in php with NULL

EDIT: 03/01/2009
NOTE! This may not be good practice. There are better ways to inserting a TRUE NULL value! This actually inserts the word NULL in the database! You may have to look over your final code and determine if my way was the best way. Also, you only have to do this if you have issues trying to insert the data into MySQL.
End Edit.

The only way this post will help you is if in your MySQL database you have NULL set to YES and DEFAULT as NULL. Most databases are not setup this way, it’s probably pretty rare. See end of post.

Recently I ran into an issue with my php script that inserts data into MySQL that has NULL fields. Here is how I fixed it.

To start in my database I have fields that can accept a NULL value, because of this I had to change the way my data was entered into the database. After I created a form to take the data I then ran it through a process to add slashes (in case there were any single quotes, double quotes, or any other non standard character).

For example, I have a field called title in my database, and in my form. Now lets say that the user of the script doesn’t enter in a title but we still want to insert a record. I need to first determine that there is or is not any data.

if ($_POST['title'])
{
     $title = addslashes($_POST['title']);
}
else
{
     $title = "NULL";
}

Notice that I put NULL in quotations. If you do not quote it you will clear out the variable. This will cause issues in the INSERT query to MySQL.

The MySQL query might look something like this.

$result = mysql_query($query = "INSERT INTO table_name (name, title) VALUES ('$name', '$title')");

I know this doesn’t make much sense, but it’s the way I had to do it because of the way my database was setup. Here is the entire php file.

<?php
if (isset($_POST['submit']))
{
  if (isset($_POST['name']))
  {
    $name = addslashes($_POST['name']);
    if (isset($_POST['title']))
    {
      $title = addslashes($_POST['title']);
    }
    else
    {
      $title = "NULL";
    }
  $result = mysql_query($query = "INSERT INTO table_name (name, title) VALUES ('$name', '$title')");
  }
  else
  {
    echo "Enter a Name!<br />";
  }
}
?>
<form name="form1" action = "<?php echo $_SERVER['PHP_SELF']; ?>" method="post" enctype='multipart/form-data'>
     <input name="name" type="text" value="name" />
     <input name="title" type="text" value="title" />
     <input name="submit" type="submit" value="submit" />
</form>

In the Database, using something like PHPMyAdmin External popup link you might see something like this.

Field———-Type—————–Collation———Attributes——Null——Default——Extra
name——-varchar(30)—-utf8_unicode_ci——–None———-No
title———varchar(30)—-utf8_unicode_ci——–None———-Yes——–NULL

If so you will need to quote your NULL before inserting the data into MySQL. (Sorry that doesn’t line up very well)
Maybe this way will help.