Archive for the ‘android’ Category.

Quick and dirty guide to OpenVPN on Slackware Linux and Android

Like many of you, I’m concerned about security, especially when working remotely. Generally I would simply create a tunnel using SSH, but then I must set all my programs to use the socks5 tunnel. This isn’t always possible without first opening the program, which will generally try to form a connection. Perhaps, not the best way to keep safe on a network you don’t trust (like a coffee shop).

Unlike using SSH to create a secured tunnel, which requires setting proxy settings for all your programs, using something like OpenVPN you can redirect all your traffic through the encrypted tunnel without having to configure anything. All thanks to using iptables.

Here is my quick and dirty guide on getting your very own OpenVPN server setup on Linux, as well as setup for two types of clients. One being a Linux client, the other being Cyanogenmod’s Android.

With this guide, I’m going to assume you already have OpenVPN installed and ready to go. Also that the configuration files are in /etc/openvpn/

Server Setup

First off, we need to generate some keys. This will be used to secure the connection. OpenVPN comes with all the tools you need to generate keys and indexes. Look for the easy-rsa directory that comes with OpenVPN. In my case, it’s in /usr/doc/openvpn-2.2.2/easy-rsa/2.0/

In that directory you will see a lot of scripts. Before doing anything you need to edit the file vars. In this file are several settings. Most important is with dealing with the openssl key. Here is a quick example you can base your configuration off of with all the comments removed.

export EASY_RSA="`pwd`"
export OPENSSL="openssl"
export PKCS11TOOL="pkcs11-tool"
export GREP="grep"
export KEY_CONFIG=`$EASY_RSA/whichopensslcnf $EASY_RSA`
export KEY_DIR="/etc/openvpn/keys"
export PKCS11_MODULE_PATH="dummy"
export PKCS11_PIN="dummy"
export KEY_SIZE=1024
export CA_EXPIRE=3650
export KEY_EXPIRE=3650
export KEY_COUNTRY="US"
export KEY_PROVINCE="CA"
export KEY_CITY="City"
export KEY_ORG="domain name"
export KEY_EMAIL="emailaddress@domain"

Note the export KEY_DIR. This is important. You will get warnings about running ./clean-all. This will delete ALL your keys.

After editing the vars file, we need to execute it to store the values in memory, then clean the keys directory. Do so by running:

. vars
./clean-all

Yes, you read that right, period, space, vars.

Now we are going to generate keys for the server and two clients.

For the server, we just need to run a couple of quick and easy commands.

./build-ca
./build-dh
./build-key-server server

The last command will build a server.key file. This is needed when running the server for key exchanges and such.

Now there are 3 different ways to build keys for clients.
./build-key client (no password protection, not recommended)
./build-key-pass client (with password protection, recommended)
./build-key-pkcs12 client (PKCS #12 format, good for Android)

For the client configuration. I’m not sure if you can use the PKCS #12 format. I haven’t tried, but if it works for you, please let me know.

Now we need to edit /etc/openvpn/openvpn.conf for our network setup. Most of the config files are self explanatory. Here is my example:

cd /etc/openvpn #yes, you do need this for some damn reason
local localIP
proto udp
port 1194
comp-lzo
verb 3
log-append /var/log/openvpn.log
dev tun0
persist-tun
persist-key
server 172.16.1.0 255.255.255.0
ifconfig-pool-persist /var/log/ipp.txt
client-to-client
push "route 10.0.0.0 255.255.255.0"
push "dhcp-option DNS 10.0.0.1"
push "dhcp-option DOMAIN domain.tld"
push "redirect-gateway def1"
keepalive 10 120
cipher BF-CBC
ca keys/ca.crt
dh keys/dh1024.pem
key keys/server.key
user nobody
group nobody
status /var/log/openvpn-status.log

Be sure to change localIP to the server’s IP address AND (if applicable) forward UDP port 1194 to the server.

NOTE: There is one issue I have run into. By using the option push “redirect-gateway def1” does seem to work fine and redirect all through the VPN, I have an issue getting the DNS and DOMAIN to work through both the OpenVPN software or my Android. This means that all DNS queries do not appear to be going through the VPN. This may not be the case. I have yet to setup a packet sniffer to check. So for the time being, I simply created a bash script that will edit my /etc/resolv.conf file when I start the VPN, and revert it back when done. If someone knows of a really easy way to check without having to use a sniffer, please let me know.

Now that all of the keys are built, and the openvpn.conf file is setup, we are ready to start the server. While I have run into some strange behavior in my configuration, you may have better luck in yours. In mine, I had to create the device tun edit ip_forward and manually configure the IP tables.

Here is my simple script I run on the server what I want to have the OpenVPN server up and running (yes, I do this at boot). Explanation of items below.

mkdir /dev/net
mknod /dev/net/tun c 10 200
echo 1 > /proc/sys/net/ipv4/ip_forward
iptables -I FORWARD -i tun0 -o eth0 -s 172.16.1.0/24 -d 10.0.0.0/24 -m conntrack --ctstate NEW -j ACCEPT
iptables -I FORWARD -i tun0 -o eth0 -s 172.16.1.0/24 -m conntrack --ctstate NEW -j ACCEPT
iptables -I FORWARD -i eth0 -o eth0 -s 10.0.0.0/24 -m conntrack --ctstate NEW -j ACCEPT
iptables -I FORWARD -m conntrack --ctstate RELATED,ESTABLISHED -j ACCEPT
iptables -t nat -I POSTROUTING -o eth0 -s 172.16.1.0/24 -j MASQUERADE
iptables -t nat -I POSTROUTING -o eth0 -s 10.0.0.0/24 -j MASQUERADE
openvpn --config /etc/openvpn/openvpn.conf --cert /etc/openvpn/keys/server.crt &

Most places I have found this stuff are not very specific about IPs. So let me give you a quick rundown on each item.

First we create the device with some special settings. That is the mkdir /dev/net (if /dev/net already exists, it will do nothing), then mknod /dev/net/tun c 10 200. Then set ip_forward to true. The fun part is with the iptables.

So in my example, tun0 is the virtual device that is the VPN and eth0 is my ethernet. 172.16.1.0/24 is the IP range I’m giving to the VPN (tun0), and my physical network is 10.0.0.0/24. You can leave the VPN network on the 172.16.1.0/24 network, simply adjust the 10.0.0.0/24 to your networking configuration (ie 192.168.0.0/24). How all those iptables work… yea, I’m not going into it. They work, I’m fine with that.

After running those commands, your OpenVPN server should be up and running. The final process is background so you get your terminal back. Wait a few seconds and hit enter again. If you don’t see the process has ended, then you have done everything correctly. If it did error, check /var/log/openvpn.log for information on what is causing the problem.

Client Configuration

Now that the server is setup, lets get the client side going. This part will be for the OpenVPN software running on Linux. See the next section for CyanogenMod’s Android.

This part is much easier than the server setup, but you need to get your keys to the client. I highly recommend you do with via scp. You will need ca.crt, client.crt, and client.key. Assuming you called your keys “client”. Put these files in /etc/openvpn/keys. Then create the file /etc/openvpn/openvpn.conf and put this in it.

remote IP/DNS 1194
proto udp
dev tun  
cd /etc/openvpn/
ca keys/ca.crt
cert keys/client.crt
key keys/client.key
client
ns-cert-type server
keepalive 10 120
comp-lzo 
user nobody
group nobody
persist-key
persist-tun
status /var/log/openvpn-status.log

Change IP/DNS to the IP or DNS name your server is reachable at. You should now be able to connect to your OpenVPN server by typing:

openvpn --config /etc/openvpn/openvpn.conf

That’s pretty much it. Once you get a handle on the settings, it is actually pretty easy. However, as mentioned before. I have found a possible issue with DNS. I would highly recommend editing /etc/resolv.conf to point to your DNS server. In my example, the DNS server is also at the gateway (10.0.0.1). You can script this. In fact, use my script.

#!/bin/bash
pid=`pgrep openvpn`
if [ -z "$pid" ]; then
echo "Starting OpenVPN Client"
cp /etc/resolv.conf /etc/resolv.conf.backup
echo "nameserver 10.0.0.1" > /etc/resolv.conf
openvpn --config /etc/openvpn/openvpn.conf &
else
echo "Stopping OpenVPN Client"
mv /etc/resolv.conf.backup /etc/resolv.conf
kill $pid
fi

Pretty strait forward if I do say so myself. You may have an issue if you have a passphrase on your key! If you are having an issue, remove the ampersand (&) from the end of the openvpn –config line. This will not background the process, but you can do it manually by typing ctrl+z then bg which will background the process.

CyanogenMod’s Android Configuration

Because I don’t run the Android that came with my phone, I can use OpenVPN with ease. If you are not running a custom rom, you can still run OpenVPN by getting the client software from the Android Market (now called the Play Store). The following instructions are for CyanogenMod 7.2, but should work in newer versions just fine.

Remember when you made your client key? Well you need to make one that works great with Android. It’s the PKCS #12 format. This will give you a file that ends in a .p12 extension. Copy this file over to the root of your sdcard.

Install the certificate by going to Settings->Location & Security->Install from SD card (under Credential storage at the bottom on the menu). It should find the file and ask for the password to unlock it. Then it will ask for a new password (you can use the same one as before) and you can also give it a custom name.

Build the client by going to Settings->Wireless & Networks->VPN Settings->Add VPN. You just need to select the OpenVPN type. In the new menu there are several settings.

VPN name (this can be anything you want)
Set VPN server (the IP or domain name of the server)
User authentication (leave unchecked)
Set CA certificate (click this and select the key you just installed)
Set user certificate (same as above)
DNS search domains (these are optional, but you can set 10.0.0.1 like in the bash script above)

Hit the menu button then Advanced.

Server port (default is 1194)
Protocol to use (udp is default)
Device to use (tun, which is fine)
LZO compression (check it!)
Redirect gateway (check it!)
Remote Sets Addresses (Should also be checked)

Everything below that I left as default. You do NOT need to enable TLS-Auth. For this type of setup it is unnecessary.

Hit back, then save. From here you should be able to connect to your VPN. Note that in my tests, the VPN is much slower. I’m not sure if it is something I have done wrong in my setup, or if my provider throttles VPNs.

Conclusion

Everything should be up and running now. I hope you found this useful. Please feel free to leave a comment below. If you have any suggestions or questions you can drop those below as well. I’m not an expert on OpenVPN, I just like learning.

Sources:
http://openvpn.net/index.php/open-source/documentation/miscellaneous/77-rsa-key-management.html
http://openvpn.net/index.php/open-source/documentation/howto.html
http://blog.johnford.org/openvpn-tunnel-to-home-server/

ShopSavvy, Compare Everywhere, and SnapTell for Android

Some time ago I wrote that I was going to start writing regular reviews on cool apps for Android. Well I got side tracked. So today I’m going to talk about 3! ShopSavvy, Compate Everywhere, and SnapTell.

ShopSavvy and Compare Everywhere use the phone’s camera to scan barcodes! It’s pretty cool. I have both simply because they both have their own different databases. For example, what I like to do is go to at my local super store and see what movies I would like. I always cringe when I see an older movie for $25 or more. That’s when I scan the barcode. Now I can see where to go to get the better deal. Keep in mind that the local portions don’t do very well all the time. This is by no fault of the program or it’s writers. It’s just the way things are.

Below are screen caps from both programs. Thinking back when I did those shots, I don’t know why I didn’t check the same product to see how the results differ.

First up, ShopSavvy. (Click on the picture to see the full size!)
Picture Index:
1. Main Screen.
2. Scan the Barcode. See the Use Keyboard button. You can type in what you want to find!
3. It found the book just fine.
4. Two different local businesses were found.
5. And a local map showing where to go.
1ShopSavy_1  2ShopSavy_2  3ShopSavy_3  4ShopSavy_4  5ShopSavy_5

Now I forgot to take a picture, but ShopSavvy will take you to the website where you can see more on the product and if you really want to you could buy it right away. That part is the same as the other programs.

Ok, so ShopSavvy is pretty cool. Now check out these pictures for Compare Everywhere:
Picture Index:
1. Main Screen
2. Scan the Barcode
3. Get your local and online store options.
4. Just a scroll down from picture 3.
5. Lets check these guys.
6. Opened the browser and took me right there.
1Compare_Everywhere_1  2Compare_Everywhere_2  3Compare_Everywhere_3  4Compare_Everywhere_4  5Compare_Everywhere_5  6Compare_Everywhere_6  

Not to bad so far right? Now I want to talk about SnapTell. If my memory serves me well, this app was originally written for the iphone, but it’s the same thing in the end. The difference here is that you take a picture of the movie, book, or what ever, and SnapTell tries the find you a match. As you will see in the pictures below, I took an alright picture of the book and SnapTell still figured it out very quickly.

Picture Index:
1. The picture I took (This is an awesome book).
2. The results.
3. Took me right to the website I wanted.
1SnapTell_1  2SnapTell_2  3SnapTell_3

As you can see, all three of these programs are very cool. I use them quite often. Did you find an app like these and really like it? Let me know so I can share the information.

Use Battery Widget to fix possible battery issues after installing CupCake

Like so many out there my battery started acting funky after I installed cupcake. Mine was an automatic update and after it downloaded my battery was at about 70%. This was apparently a bad thing. It seems everyone who installed cupcake with a low battery has tried to charge it but it never seems to reach 100%. Some say to just pull the battery, some say use the phone until it dies then charge. I did both with no success.

Before I continue with how I solved the problem let me first give some information about how this all came to be. My battery would stop charging (or so I thought) at about 87%. While using the phone throughout the day I noticed that the battery level didn’t drop below 87% for quite some time. This told me that there is nothing actually wrong with my battery and must be related to the phone (I wish I realized that before getting a replacement battery from HTC, whom by the way has excellent customer service!).

So here is what I did to solve the problem. Granted I did this only a couple of days ago. The first day of charging 100%, the next, about 97%, the third, 100% (that’s today). I will keep track of the battery level throughout the next week or so and update this post. First, open your Market and search for “Battery Widget”, for me it was the third in the list. Make sure you get “Battery Widget” and nothing else. Install, then place it on your desktop. You will get an icon that looks like this.
icon
The program does add a couple nifty features. Just click on it and you get:
screen
The top and bottom option will load into new windows (these same things are found in your Settings menu.)
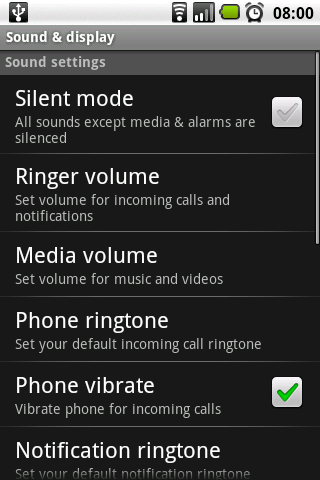
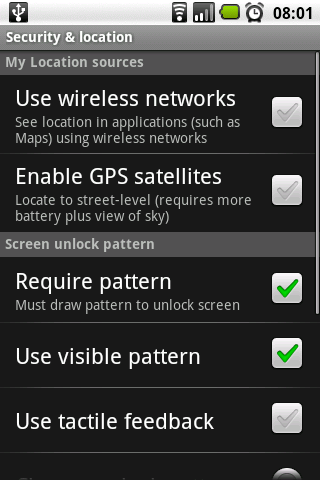
sound & display   Security & location
If you hit wifi, it will just turn your wifi on, it doesn’t take you to your settings menu.

Did Battery Widget fix your phone’s battery issue? Hit the comments and let us know!

UPDATE! Well it seems this really didn’t solve anything for me. Damn, I was very hopeful it would. Guess I need to either get that giant extended life battery or manually reinstall cupcake.

UPDATE! … again… Here’s the thing. If you tried pulling the battery, draining it, or running Battery Widget and none of those worked try to reinstall cupcake. I have even tried that and it didn’t work for me. Apparently I need to install an older version then to cupcake again. For me it’s not a big enough of a deal to bother going through that headache.

Check out Android Central on instructions and links. Please keep in mind that before you can install you must turn the phone off then back on using the home + power button! That will not restart it! Turn the power off then home + power for it to start properly! I wish everyone the best of luck in this matter. I just hope when my 220mAh battery arrives I won’t have any problems… and it did! I would highly recommend the battery, the case makes the back speaker quieter, but I’m sure I can fit that with a plastic tube inside the case… that is, if I ever get around to it.

War Driving with WifiScan for Android

About once a month I’m going to do a write up on an featured Android Application. I love my Android phone and I have been recommending to all my friends to get one. So The first one I’m doing is called wifiscan. Enjoy.

I’ve been a fan of War Driving for a long time. If your unsure of what War Driving is let me explain. All you do it get a good wifi card (one with external antennas are even better) and drive around town looking for open networks. Keep in mind 2 things. For starts, I don’t actually do this anymore because I have the net on my Android and an actual cell card so I get access anywhere I go. Second. Some consider it illegal to scan for networks. This is not true, as long as you don’t use the network without permission from the owner!

I use this program quite a bit on my phone since currently where I live 3G is not available and I need to use EDGE. It’s not slow, but trying to show a friend the new monitor I was to get on newegg.com takes a while to load. We are usually at coffee shops so I use wifi scan to ensure I’m connecting to the correct wifi. Also the program does have a couple limitations. When exporting a kml file (for google earth) it can cause the Android to think the program has frozen. It hasn’t. Actually the Android is just show at writing files, click wait and deal with it. Also it only scans once every 3 seconds. Most scanners you would use on a laptop scan many times per second depending on what you card can handle. Therefor this doesn’t work well when shooting down the freeway at 70MPh nor driving 25 through a neighborhood. It’s not perfect, but I still like it.

Please note that I have blurred out any information that could compromise the security of anyone’s network or location.

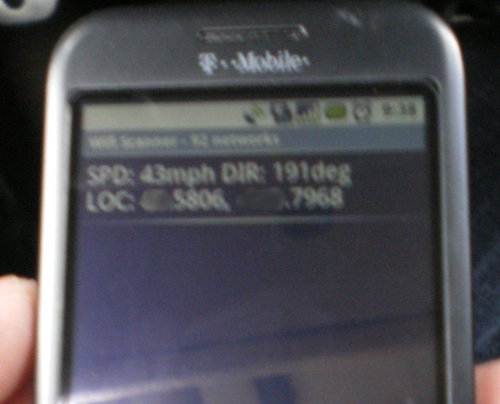
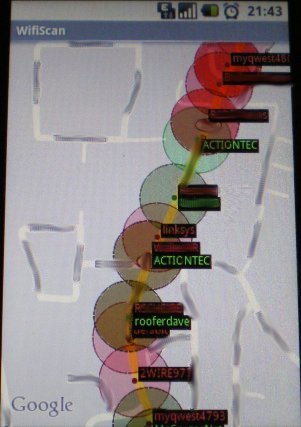
To start I love the speed and direction that is shown. I tried to take a picture when I got to an open stretch of road with no one near me, but the picture turned out a little blurry. I’m sure you get the gist of it.
phone1

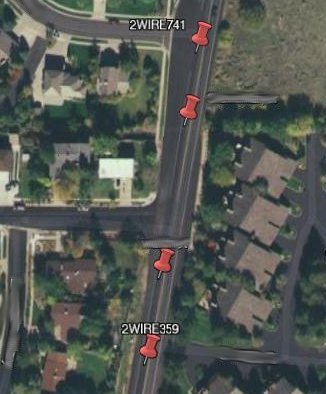
Just so show how cool this program is I exported the kml file and loaded it in my google earth. It doesn’t exactly pinpoint the exact location (like what house it’s in) of the network, but it does a good job none the less.
ge1ge2
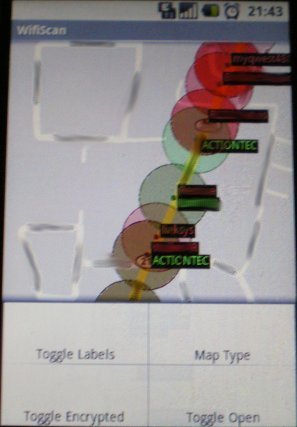
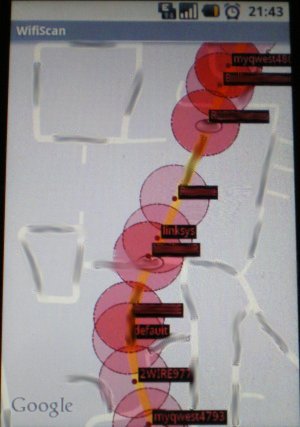
The red pins are encrypted networks and green are open. You can even toggle it to show only encrypted or only open networks. Here are 4 pics that should be helpful. Once again I’m sorry that my picture taking abilities are not very good.
bothoptions
reggreen
Did you see my battery drop? That does happen when I get off a long phone call and start using the phone for other things.

Anyways, even if your not a War Driver I still recommend this program, it’s a lot of fun. You can download it from the Android Market.

Check out the developers website at www.waterflea.com/android.php

Tetherbot, Android, and Slackware How to

After trying to get my Android (aka, T-Mobile’s G1) working on my Slackware laptop and having many problems I looked for help at androidcommuinity.com. Even tho they didn’t technically help me solve the problem they were still a great help, and there quick replies kept me thinking of what the problem could be, and I thank them for that. In the end it was my own fault. Here’s the story.

My laptop runs Slackware 12.0 with a new custom 2.6.28 kernel and there was were the problem was. As it turns out I failed to turn on and modularize certain USB functions, now I’m unsure of what I enabled that made it work.

First, if you think it’s a problem with your kernel check your USB device settings. I use the make menuconfig when I build kernels, if you use xconfig it may appear slightly differently.

Check under Device Drivers –> USB Support. I turned on just about everything and modularized just about every USB device, don’t forget to turn on USB Gadget Support I turned on the top 3 options, they are for debugging and also Serial Gadget was modularized. Click Here to download my .config file. This file is in the root of where you extracted your kernel (usually /usr/src/linux-2.6.28/). Be sure to rename the file from DaijoubuKun.Android.config to .config otherwise you will need to tell your kernel to use that file. Quick note: I know I have a lot here that does not need to be turned on, I like large kernels with lots of modules.

UPDATE!
Put your 50-android.rules file in /etc/udev/rules/ and chmod it to 755!
Also in your kernel build make sure you turn on USB debugging mode!!!

If you think your kernel is OK check out graha.ms. There is a lot of the stuff your going to need to know there.

Now, at this point I’m assuming you visited the link above but your Tetherbot still isn’t working. This may be because the commands google gives may not work in Slackware. I wrote 4 lines more designed in Slackware’s udev style. Below are 8 lines. I’m sure you only need one, but it didn’t hurt me none to use all 8, the bottom 4 are mine. Here is my 50-android.rules

SUBSYSTEM=="usb", SYSFS{idVendor}=="0bb4", MODE="0666"
SUBSYSTEM=="usb_device", SYSFS{idVendor}=="0bb4", MODE="0666"
SUBSYSTEM=="usb", SYSFS{idVendor}=="0bb4", MODE="660"
SUBSYSTEM=="usb_device", SYSFS{idVendor}=="0bb4", MODE="660"
SUBSYSTEM=="usb", ENV{DEVTYPE}=="usb", SYSFS{idVendor}=="0bb4", MODE="0666"
SUBSYSTEM=="usb", ENV{DEVTYPE}=="usb_device", SYSFS{idVendor}=="0bb4", MODE="0666"
SUBSYSTEM=="usb_device", ENV{DEVTYPE}=="usb", SYSFS{idVendor}=="0bb4", MODE="0666"
SUBSYSTEM=="usb_device", ENV{DEVTYPE}=="usb_device", SYSFS{idVendor}=="0bb4", MODE="0666"

I know it’s got to be overkill to have 8 lines in there, so if you figure out which is the one that works post it in a comment and I will edit this to show that line with credit to you.

NOTE: When you plug in your phone you will be asked if you want to mount the sdcard to your computer. SELECT NO! According to rynosaur of androidcommunity.com.

Note, to make things easier copy the files is your tools/ directory (from the android sdk) to /bin. This way you do not need to go to the download directory to run the adb program. You can also copy the libs to /bin/lib

Now run adb devices. You should get some out put like

List of devices attached
HTxxxGZxxxxx    device

If you do then we are ready to go!
If not did you remember to run on USB debugging?
Start the Tetherbot program and hit Start Socks
Now type ‘adb forward tcp:1080 tcp:1080‘. This will forward and thing you send to ‘localhost:1080’ to the phone.

Using nmap I found that Tetherbot uses socks 5 with no authentication. This makes things a bit easier. Once you have gotten this far you are ready to setup your web browser to use the socks proxy. I have done this in SeaMonkey and Firefox (haven’t tried anything else yet) so here are the instructions for FireFox 3.0.x (should stay about the same for future versions).

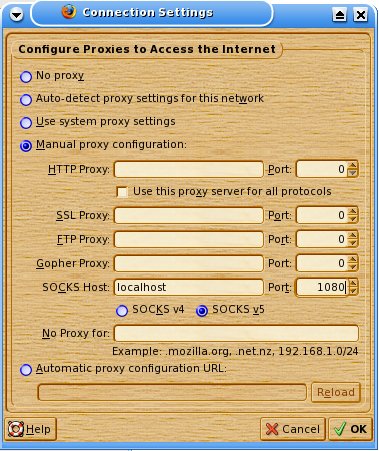
Go to Edit –> Preferences –> Advanced (top tab) –> Network (lower tab) –> Connection Settings (button).
Select ‘Manual Proxy configuration‘ and put localhost in SOCKS Host and port 1080 in port. ONLY put that information in the SOCKS Host! Do NOT put it in HTTP Proxy! Be sure to select Socks v5 and (this may not be necessary) remove anything in the field No Proxy for:
Here is a picture:
proxy settings
Once you do that everything will go through your phone. I did read that there is a 1GB per month limit on the phone. I do not know if this is true or not. I’m only going to use Tetherbot when I’m doing a service call, I need a file and there is no other way to get online.

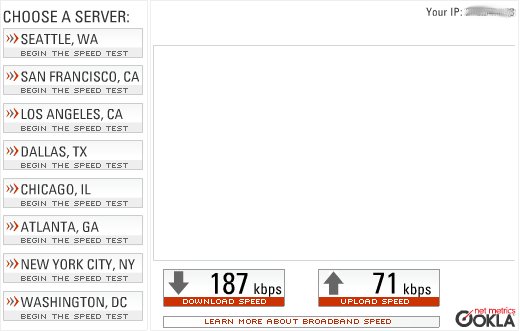
Lastly, just as quick bit of info. I live in an area where T-Mobile doesn’t have 3G! It sucks, but I’m told it’s coming later this year. It damn well better with how much I pay every month for this thing. I ran a bandwidth test through the EDGE network (it’s like 2.5G) and below is my speed.
bandwidth test
Granted, I only ran the test once, and early in the morning. Plus I don’t think the phone was designed to have these sort of things run through it, but it will have to do for now. P.S. Thanks for the awesome speed test program Speakeasy.

Special note: I could be wrong, but it seems that after you put the required information into 50-android.rules you may need to either restart or run /etc/rc.d/rc.udev restart to restart the udev service. You may also need to replug in your phone, make sure you don’t mount your sd card as it may cause tetherbot to not function properly.

If this helped you in anyway please let me know. If it didn’t help post your problem and I will try to help.